Parallels Plesk Panel 10 end-user series
24. How to manage your domains' DNS Zones in Plesk
DNS Zones control the way your domains and subdomains work. Plesk gives you full control over your DNS zones, assuming your hosting plan grants access to this feature.
1) To access your DNS zones, go to Websites & Domains.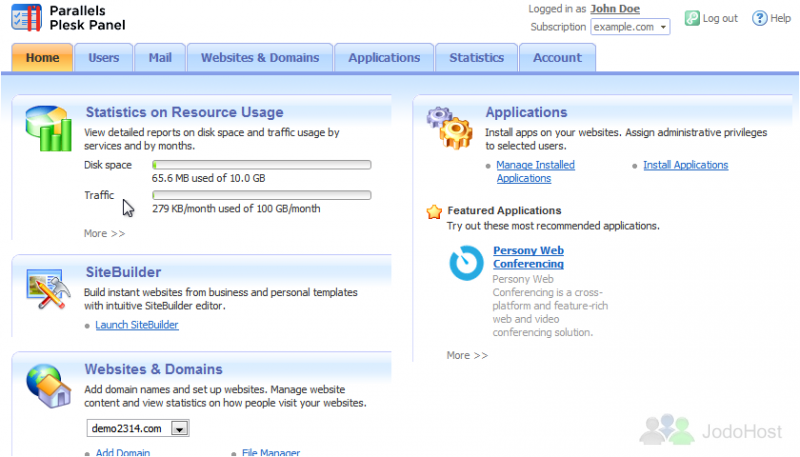
2) And then DNS Settings.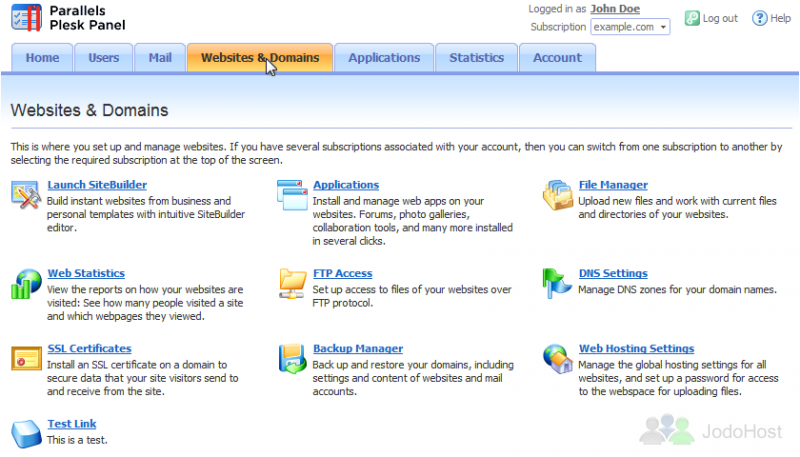
You'll see a list of all the domains on this subscription.
3) Click the [Manage] link next to a domain to manage it.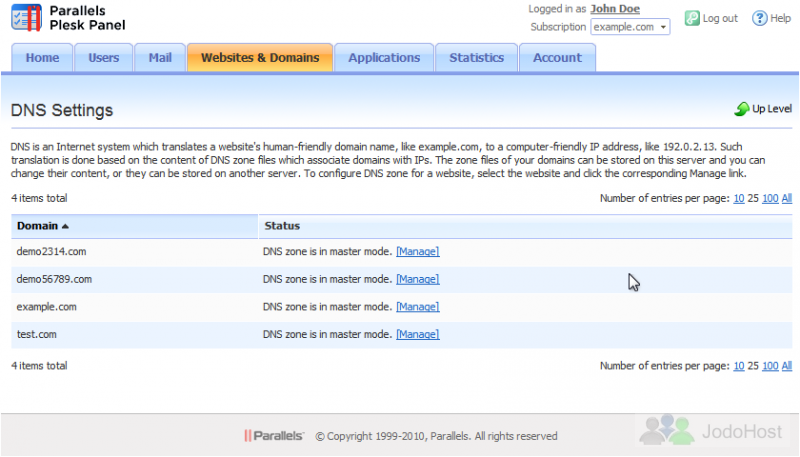
You'll find a number of tools here. You can Switch Off the DNS Service, which will make the Plesk server stop responding to any DNS requests for this domain. Switch DNS Service Mode makes the Plesk DNS server act as a Slave for this DNS zone and use an external DNS server instead. You can also Add a Record, modify the zone's Start of Authority (or SOA) Record, or restore this zone to the server's defaults. Let's Add a Record.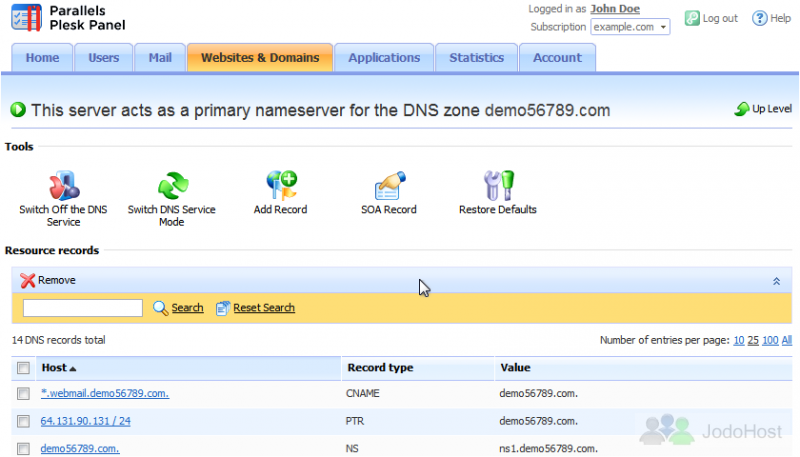
4) First, choose the Record type. We'll leave this set to A, which lets us point a subdomain to an IP address.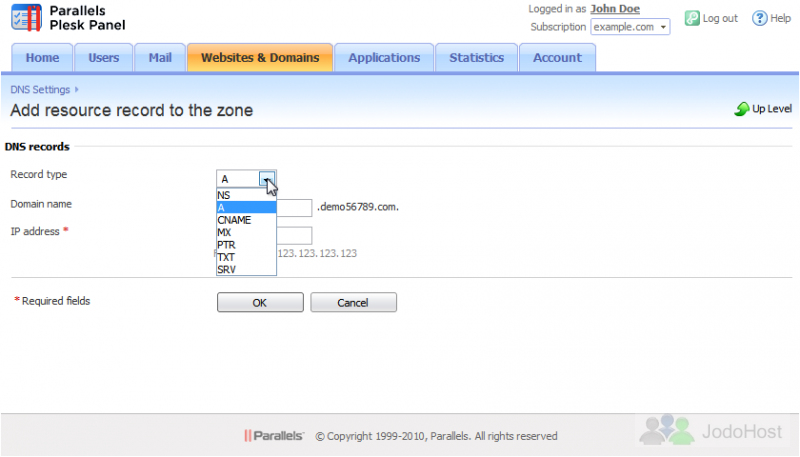
For specific information on each Record type, view this area's Help page.
5) Next, we'll enter the domain name and the IP address for this record.
6) Click OK to submit the page.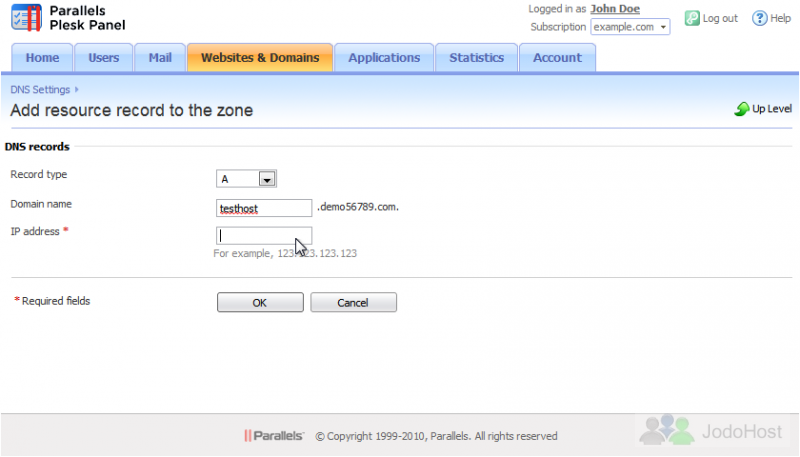
7) The DNS record has been created, but not yet saved to the live DNS zone used by the server. Click Update to apply the changes to the DNS zone or click Revert to abandon the changes.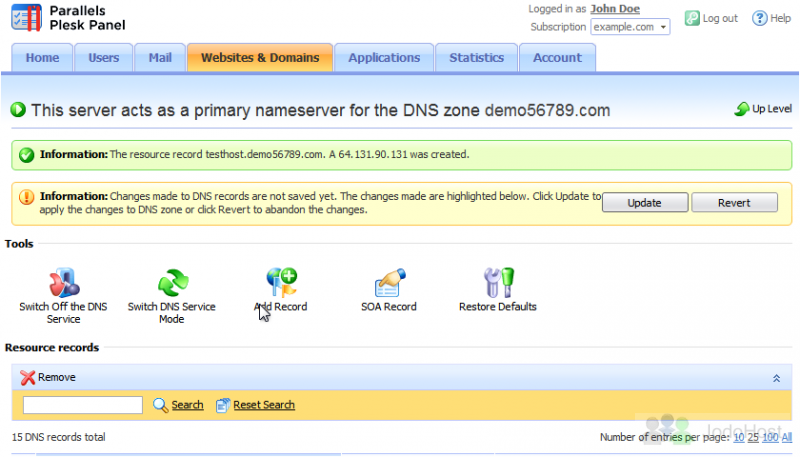
And now the changes have gone live.
Below you'll find a list of all the records in this domain's DNS zone. You may need to edit these at some point. Here's the record we just added.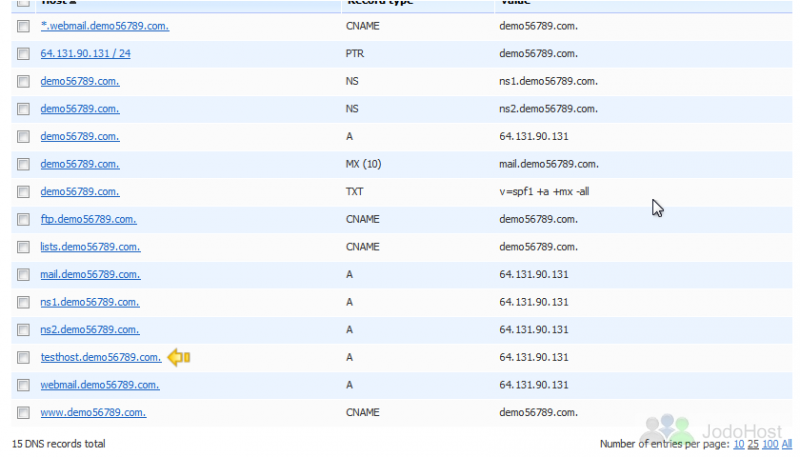
You would click on an entry's link to edit it.
8) To delete one or more DNS records, click the checkbox next to each...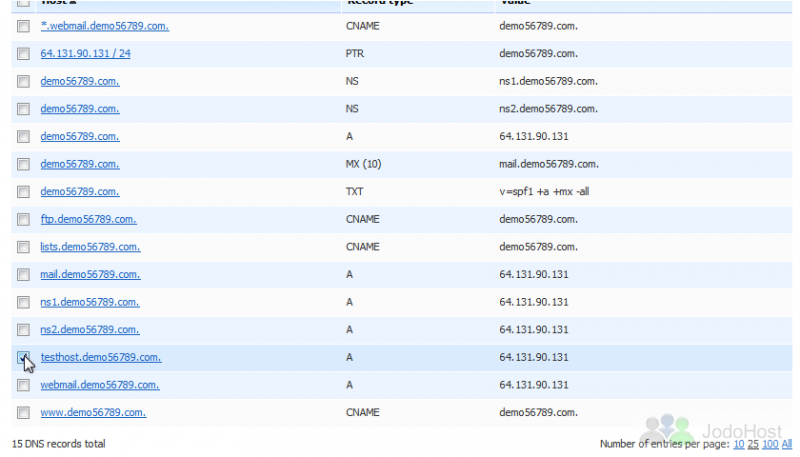
9) And then click Remove.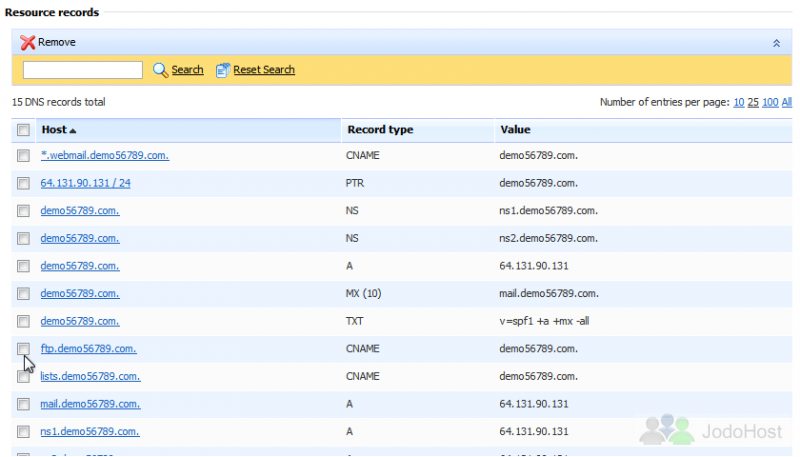
10) Confirm the removal, then click OK.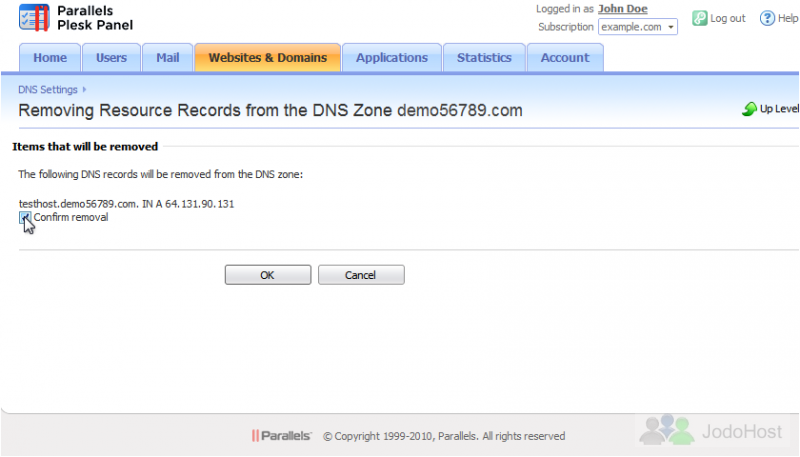
11) Again, you will need to click Update or Revert in order to apply or abandon the changes.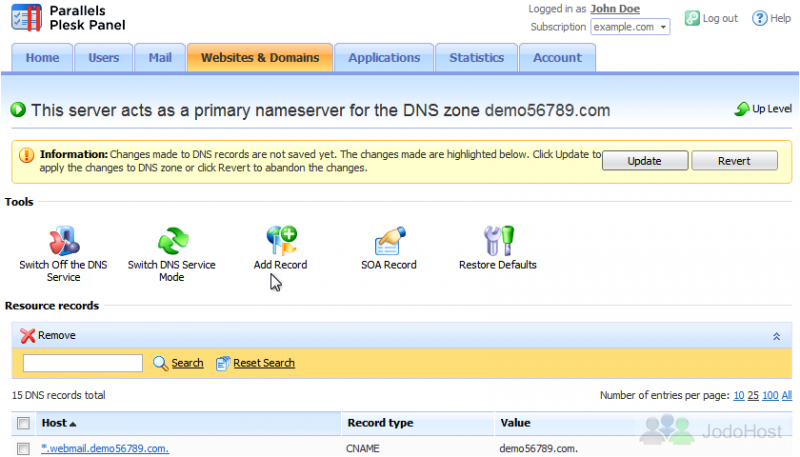
This is the end of the tutorial. You now know how to manage DNS zones in Plesk.