| This guide is designed to help new resellers to set up their reseller account easily and quickly. HSphere is one of the most powerful reseller systems ever designed. Understanding it can be a bit challenging to new comers. But we guarantee you that once you master it, you'll enjoy the full range of features offered. At JodoHost, we can not stress more than to read each and every word/sentence of this guide carefully to ensure you enjoy your reseller experience 0 - HSphere Introduction HSphere is a multi-level, multi-platform Control Panel with complete billing and support integrated into it. JodoHost supports both the UNIX and Windows hosting platforms that HSphere offers. That means as a reseller you can create plans and resources on both our UNIX and Windows servers. As a reseller you must also understand that there are 3 primary Control Panel levels in HSphere: 1) Reseller Account CP - This is the control panel you as a reseller will see when you first login into your reseller account from https://cp.myhsphere.biz. It allows you to see basic information about your account, upgrade/downgrade. change your account's contact details as well as manage your billing information with JodoHost. Everything in this CP pertains to your relationship with JodoHost 2) Reseller Administrative CP - This is the control panel through which you manage your hosting business. It allows you to set up your name servers, hosting plans, merchant gateway, support, billing, etc. It also allows you to manage all your customer accounts and signup requests. 3) End-User CP - This is the CP through which each of your customers can actually manage their website from. Here customers can setup websites, mail boxes, databases, etc. The Reseller Admin CP doesn't allow resellers to host their own personal websites. You as a reseller would need to signup for one of your hosting plans as a customer in order to setup your personal websites and access the end-user CP. Hence, ensuring you follow all the steps in this guide are crucial before you can begin hosting any domains. 1 - Getting Started Step 1: Your Welcome Email After you finish the signup wizard for your new reseller account, you'll have to wait for 24 hours before your account is activated. When your account isactivated, you'll receive an email like below. If you do not, contact [email protected] Dear Yash Kumar, Thank you for choosing JodoHost for your Web hosting needs. We look forward to working with you to make sure you get the most of your account, and we wish you success with your online venture. To access your account with the Control Panel, use the following information: URL: https://cp.gohsphere.com/ Login: myaccount Password: mypassword Account ID: 33685 Thank you for your business, JodoHost If your Control Panel URL is specified as "https://cp.myhsphere.biz", please visit the HSphere 2.4 version of this Step by Step Guide Step 2: Logging into your account Click on the control panel link in your Welcome Email and you should see a screen like this: |
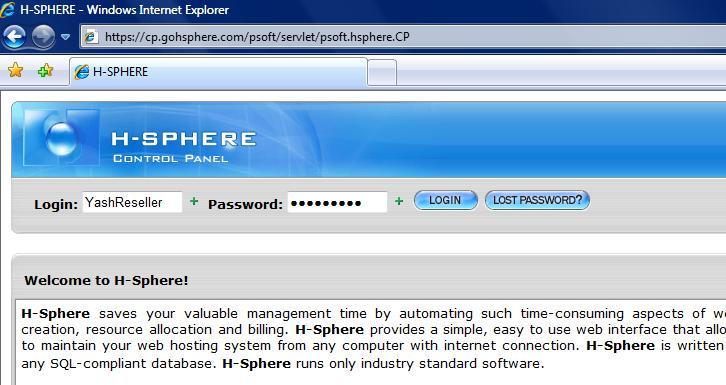 |
| Type in your username and password and then click "Login" Step 3: Logging into your Administrative Account Once you have logged into your account, you'll see a screen with a button to "Enter Admin CP". This logs you into your Reseller Administrative CP. |
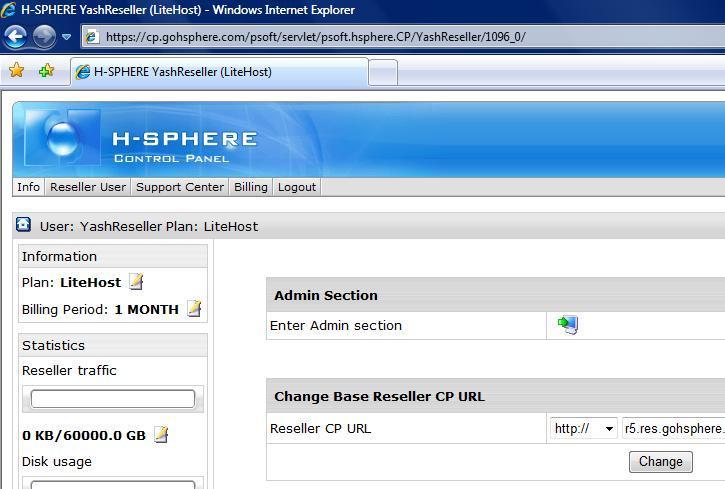 |
| Please enter the Admin Section. You will then see a screen as shown below |
 |
| Step 5: Entering your Company Info The first thing you must do once you have entered your Administrative Account is enter your company information From the top navigation menu, click on Settings > Look and Feel > Company Info |
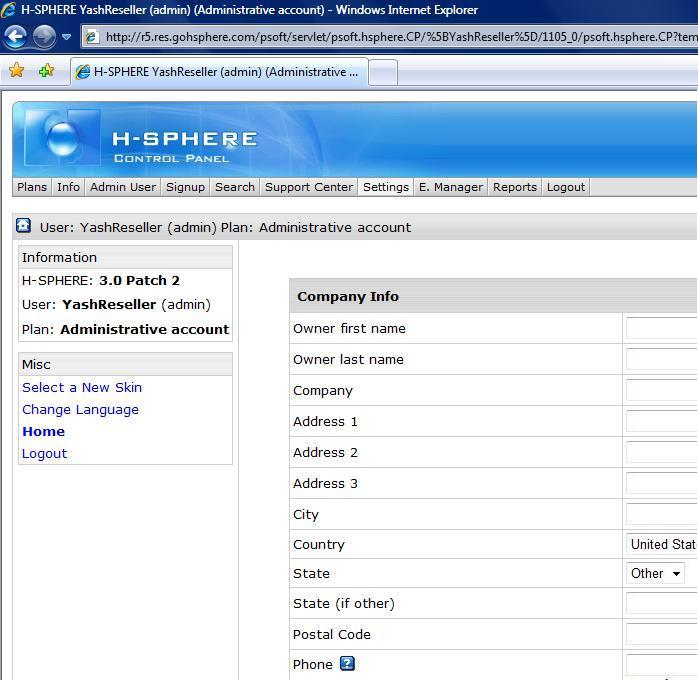 |
| Lets assume you are the owner of MyWebHost Inc and your hosting/corporate website is www.mywebhost.net. Fill in your company details: |
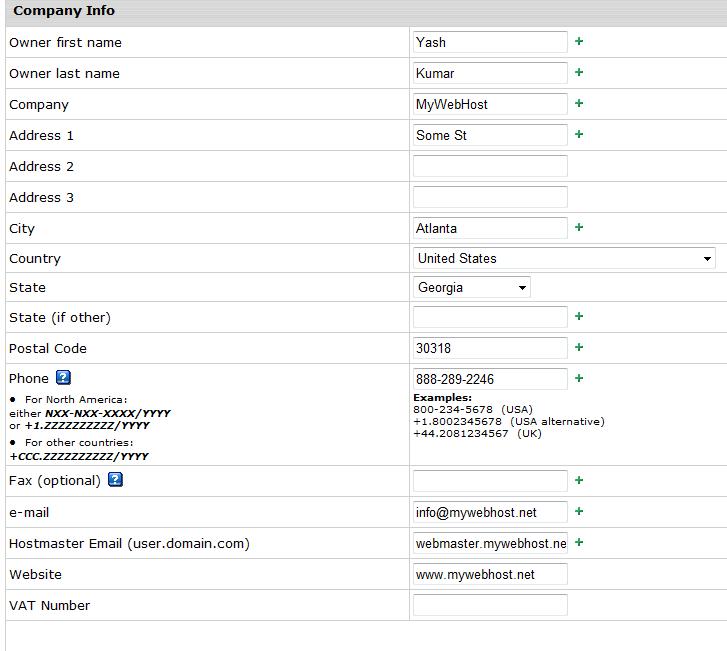 |
| Notes: Hostmaster Email - Fill in any email address as your hostmaster email here. Note that you must use "." instead of ""@". So if your website was mywebhost.net, your hostmaster email could be webmaster.mywehbost.net or admin.mywehbhost.net. Once you have filled out the form, click on "Save" |
| Next >> |